I am an all species, all methods angler. I have spent the past 20+ years hunting striped bass with bait, plugs, and flies from Maine to Montauk via shore, kayak, boat, and skishing. The more I learn, the more I discover what I do not know. Before I start forgetting more than what I learn, I want to capture and share my personal experience and knowledge. Hence, my book project!
I will continue to write blog articles during 2021, just at a lower publishing frequency. I will also continue with my monthly newsletter, which in 2021 will have subscriber only content! Do I have a project for 2022? Do fish swim?
I first learned of the Gloucester Light Dory in an issue of On The Water. The simple design and fishability of the boat captured my attention. I was born on a small island in the mid-Atlantic. My family fished and built boats. The OTW article inspired me to build a Gloucester Light Dory and reconnect with my heritage. My goal was to simplify the build process and increase the fishability to the extreme.
The most important feature of my custom Gloucester Light Dory is invisible. The boat is built via stitch and glue. For stitches I used staples driven via DeWalt pneumatic power tools, which are are significantly stronger than twisted copper wire stitches. In addition to the staples, each joint is triply re-enforced via epoxy fillet, fiberglass tape, and fiberglass cloth. The marine plywood is 100% enclosed (inside and out) via multi-layers of fiberglass cloth and West System epoxy. There is no possibility for rot on this boat!
Each feature on my boat has its own story. But, that’s a story for another time. ;-). In short, here are the visible features:
Color via epoxy pigments (no paint to scratch or flake)
After countless hours and sheets of sandpaper, I finally launched my custom Gloucester Light Dory. The boat performed beyond my expectations. The boat is surprisingly stable. I was able to stand up and cast, which I cannot do on my kayak. A pair of 7 foot oars provide maximum propulsion with minimal effort. The oars, unlike a kayak paddle, give me infinite control to move the boat forward, backwards, and sideways. When fishing, I rest the oar blades on the rear seat. On this first trip, I landed the meanest, bad-ass, bluegill terrorizing bass in my town’s lake.
Building a custom Gloucester Light Dory tested my high school knowledge of Geometry, required two cups of patience for each cup of coffee, and pushed my problem solving skills to the edge of my imagination. I am proud to say that owning a one-of-a-kind, low-maintenance, high-performance fishing machine at a fraction of the cost of a commercially built boat is priceless. 🙂
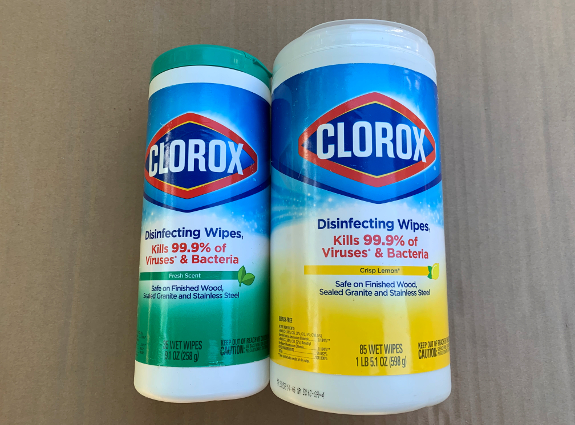
I use my DIY Plug Crate storage solution to manage my plugs. The COVID19 global pandemic has inspired me to simplify this storage solution. Instead of buying and cutting PVC rain gutter drain tubes, another option is to use empty Clorox wipes containers.
Making this COVID19 inspired DIY Plug Create is easy! First, remove the tops from the Clorox wipes containers. Second, drill or puncture some drainage holes on the bottoms of the Clorox wipes containers. And lastly, insert the Clorox wipes containers into the milk create.
The first advantage of this Plug Crate is the cost: the empty Clorox containers are $0.00 and no plexi-glass for the bottom is required. The second advantage is the simplicity of the build: no cutting required. The single disadvantage is that the Clorox containers do not fully optimize the interior volume of the milk crate.
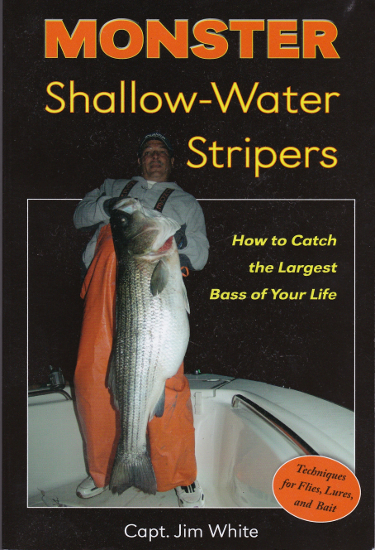
I purchased Monster Shallow-Water Stripers after I met Capt. Jim White at a Plum Island Surfcasters fishing show. The book collected dust while it rested on the top shelf of my striped bass library because at first glance, it looked like a “boat fishing” book. OMG. I was wrong!
After reviewing this book, I calculate that approximately only 40% of the book is focused on targeting striped bass via boat; 80% of which, is directly applicable to targeting striped bass via kayak or surf. In addition, Capt. Jim White has chapters dedicated to kayak fishing, fly fishing, surfcasting, weather, and electronics. After reading the “Working with your Captain” chapter, I started catching quality fish on my charter trips. Coincidence?
Capt. Jim White has done us a HUGE service to the saltwater angling community by documenting the hard and soft structures that attract and hold striped bass:
Flats
Rivers
Points
Sandbars
Coves and Bays
Docks and Piers
Rock Piles
Bridges
Breachways/Inlets
Shadow Lines
Baitfish Schools
Water Color Lines
Scum Lines
I will never look at a coast line the same way again. Fish beware!
Bottom line, if you target striped bass in shallow water from boat, kayak, or surf, then you must Monster Shallow-Water Stripers by Capt. Jim White with undivided attention. The field proven tips for targeting striped bass via fly from a boat alone are worth the small cost of this book.
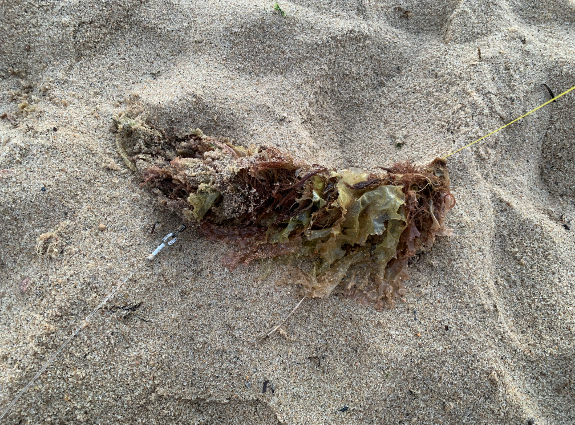
I went surf sharking recently. Prime time of year. Perfect tide. Optimal moon. But, the constant onshore wind swept in weed so thick that I had to reel in my presentation every 15 minutes to remove a wad of weed. Spending 15 minutes per weed wad was was cutting my fishing time in half! After the third weed wad, I decided to adopt a new weed management strategy.
I fish braided line when targeting trophy fish. Since braided line is expensive, I re-use the “rear section” of the braided line on my large saltwater reels on my smaller freshwater reels. Hence, I have developed a simple DIY Line Un-Winder.
In order to make this DIY Line Un-Winder, you need an empty 1/4 lb spool, a 6″ long bolt, two flat washers, and a nut. First, secure the bolt through the empty spool. Second, attach the exposed end of the bolt to a power drill. Third, secure the line on your reel to the empty spool via tape. While holding the drill with one hand, use your other hand to keep tension on the line as you guide the line onto the spool. This ensures that the line fills the spool tightly and evenly.
Once the line is removed from the larger reel, repeat this process to transfer the line to another empty 1/4 lb spool. This will “reverse” the line. You can then use this second spool to fill your smaller capacity reel with braid that was hardly ever used on the larger reel (the “rear section”). The remainder of the braided line can be used for other DIY projects. 🙂
In addition to saving money, this low cost DIY Line Un-Winder also helps to save the environment. Build yours today and start reeling in the $avings!
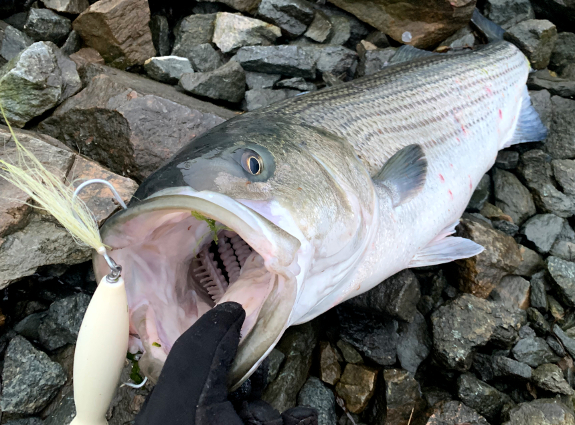
Striped bass swim in the Eastern and Western coasts of the continental United States of America. In Massachusetts, we are fortunate to have monst’ah strip’ahs. If you want to successfully target these large fish, then you need to start fishing less. More specifically, fish patterns. Saltwater fishing patterns are complex and inter-dependent. The first pattern to master is the “TOY-TOD-SOL-LUNAR” pattern.
June is a great time of year (TOY) for Massachusetts anglers because migrating striped bass collide with moving bait fish like mackerel, menhaden, squid, and herring.
I have fished from sunrise to sunset. Based on multi-year data from my fishing journal, I have hooked the most fish one hour before and two hours after sunrise and sunset. Hence, the best time of day (TOD) is around light transitions, which trigger striped bass into feeding.
Some anglers worship the New Moon and curse the Full Moon. Other anglers worship the Full Moon and curse the New Moon. I am not LUNAR-religious. I fish the New Moon and the Full Moon equally because they produce similar tides. I have had great success two days before and two days after the New and Full moons. My journal entries suggest that the Moon’s tidal effect is more critical to hook striped bass than the ambient light it produces.
The TOY-TOD-SOL-LUNAR pattern by itself is not enough! You need to apply this pattern to a structure that will attract and hold fish. A structures will hold more fish on the flood or the ebb. Keep a fishing journal to help you identify what tide produces best on your structures during the TOY-TOD-SOL-LUNAR pattern.
Fishing patterns will only hook monst’ah strip’ahs. To land them, you need exceptional gear like a St. Croix Mojo Surf rod (length: 11′ | Lure: 2 – 6 oz) and a water proof reel like a ZeeBaas reel, which has 40 lbs of drag and a 500 yard capacity for 50 lb braided line.
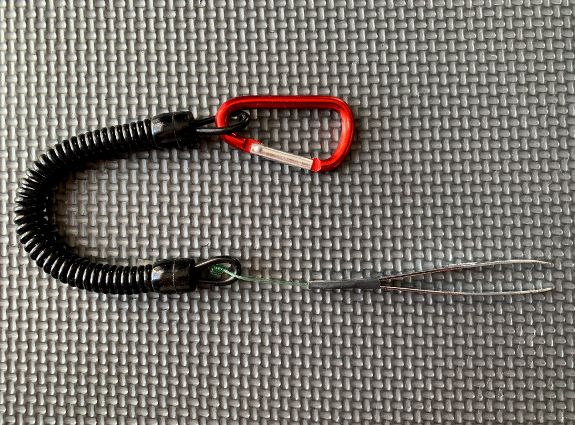
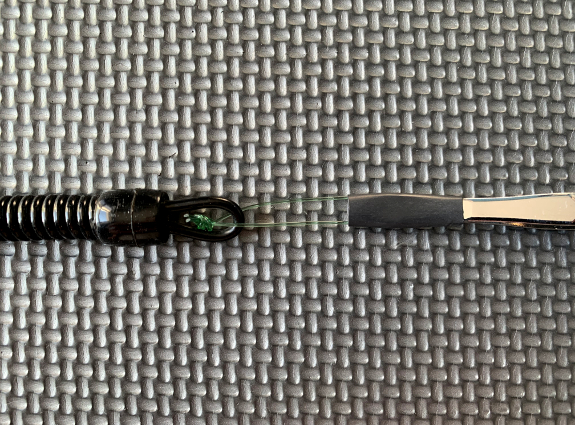
Tweezers are a great tool for precision work like collecting scale samples from fish. Unfortunately, tweezers easily hide in nearly unreachable cavities in my surf bag, kayak, and tackle box. Tweezers also jump out of my hand while I am trying to carefully collect scale samples from a nervous fish. I have hence developed a simple method to join tweezers to a lanyard.
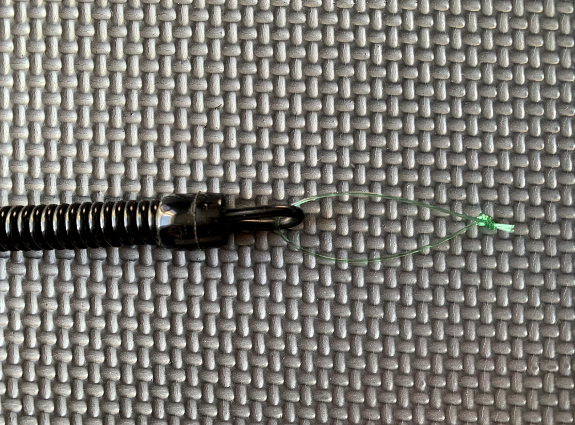
Attaching tweezers to a lanyard is simple and only requires inexpensive tools and materials. First, secure a 2″ 50 lb monofilament loop to the end of a lanyard via Double Surgeons’ Loop Knot.
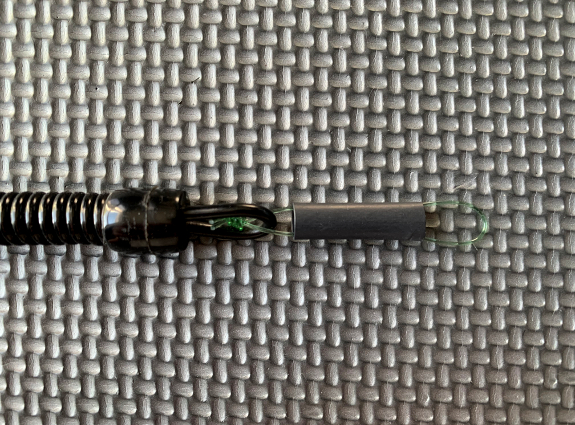
Second, insert the monofilament loop through an appropriately sized heat shrink tubing (e.g. 1″ length | 3/16″ diameter).
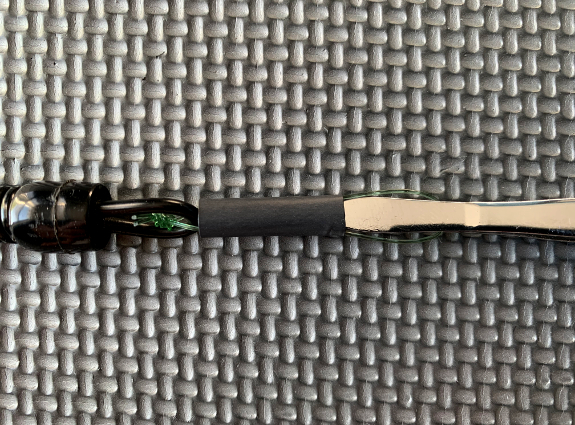
Third, pass the monofilament loop all the way up between the tweezers’ arms.
And lastly, slide the heat shrink tubing onto the tweezers and apply heat.
This simple solution keeps my tweezers secure and accessible at all times. The less time I take to collect scale samples for the Sportfish Angler Data Collection Team (SADCT), the faster the fish recovers. Time is fish!
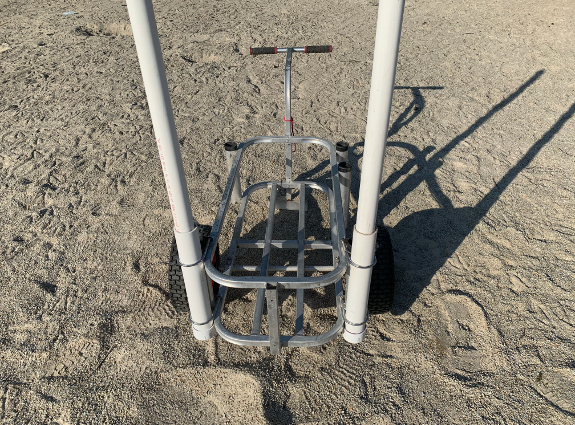
I use 5 foot PVC sand spikes (1.5″ diameter) when chunking the surf. I secured them under crisscross bungee cords that kept my gear inside my surf cart. This method worked well, but it took time. Hence, I have developed a new sand spike holder for my surf cart.
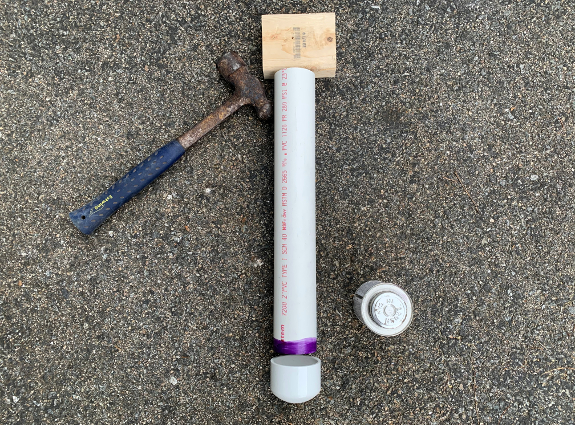
Making your own surf cartsand spike holders is easy. You only need some simple tools and materials. First, measure and cut a length of 2” PVC pipe such the the 2” end cap is just below the bottom of the cart and the top of the pipe is 4.5” above the cart. This is the optimal length to support the sand spike while in transit. Prime one end of the 2″ PVC pipe and let dry.
Apply some PVC adhesive to the primed end of the PVC pipe and insert it into a 2″ PVC cap. Place a piece of scrap wood on the other end of the PVC pipe and hammer the pipe into the end cap. Repeat for the second sand spike holder.
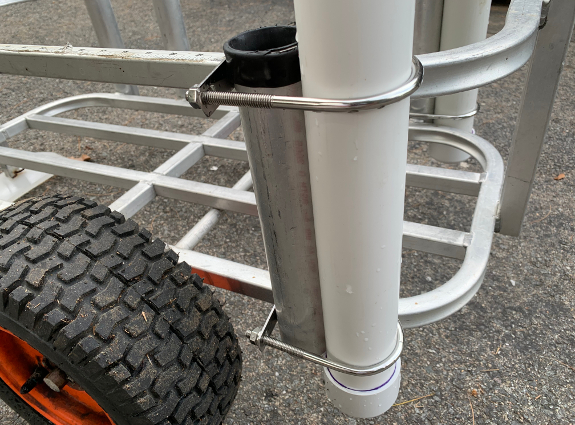
Mount the sand spike holder to the side of your cart via stainless steel U-bolts (e.g. 5/16″ x 2 1/2″ x 5″). To ensure that the nuts do not loosen while in transit, I used 5/16″ stainless steel split lock washers. Make sure that the U-boots are facing towards the tires so that you do not snag your pants or waders as you walk around the cart.
This surf cartsand spike holder works exceptionally well. Storing my sand spikes now takes seconds, not minutes. The less time I spend packing my gear between spots, the more time I fish. Time is fish!
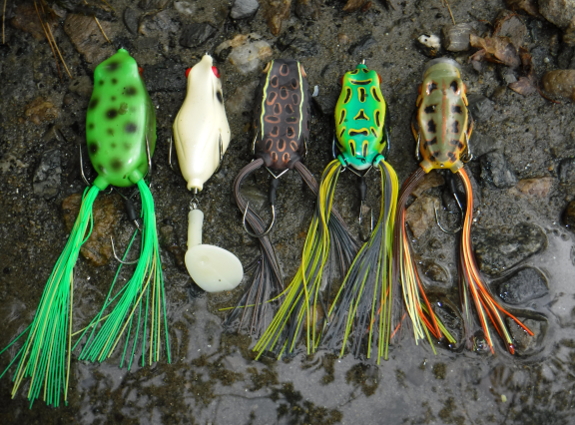
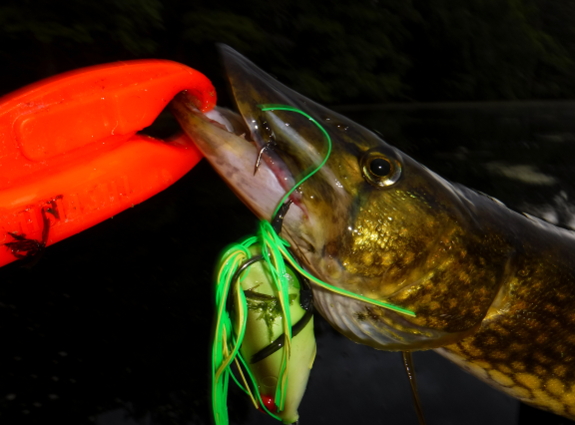
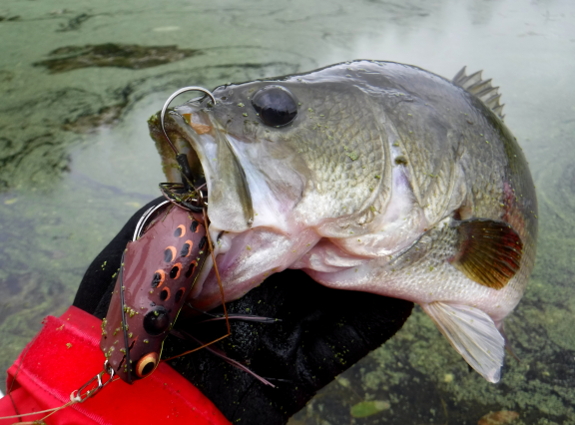
Last June I took the Five Frog Challenge with five solid body frogs. This June I took the Five Frog Challenge again, but this time, with five hollow body frogs.
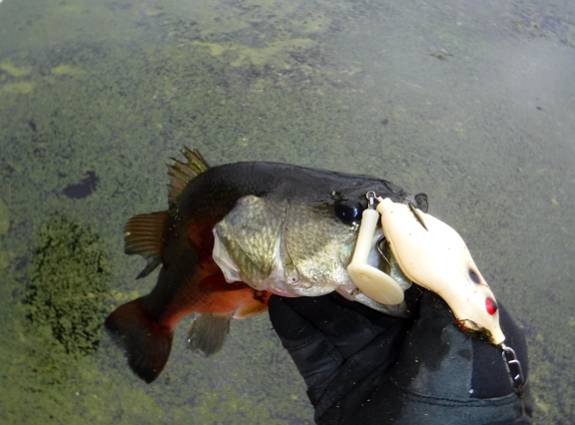
I caught the first fish at 05:42 AM on the KVD Sexy Frog (2.5″, 5/8 oz).
I caught the second fish at 06:07 AM on the Teckel Sprinker Frog (2.75″, 5/8 oz).
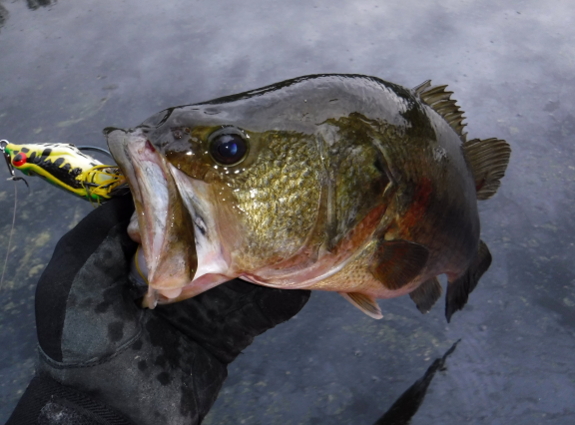
I caught the third fish at 06:38 AM on the Livingston Lures Freddy B Frog (2 7/8″, 7/8 oz).